Saturday, January 1, 2022

3-TO-INSPIRE WITH ASHLEY


Happy New Year!! I am so excited to be on the Blog today, with my first post as a part of the 2022 CTK Design Team. There is a lot going on today, so make sure you check it all out. You can see the NEW products for January in the CTK shop. There is also a fun Instagram Hop happening today with the new Design Team...and there are some great prizes that you don't want to miss out on!!

Now, for today's post! I've got a fun 3-To-Inspire challenge for you. I used some of the January Life Crafted products with some of the CTK exclusives for my Traveler's Notebook layout.

Here are my 3-To-Inspire:

1. Use a shaped photo

2. Mix at least two embellishments (I did three - stars, hearts and butterflies)

3. Add a cluster around your photo

I thought it would be fun to use one of the large shipping tags as the background for the left-hand side of my layout. I placed a larger photo on the shipping tag and created a cluster in the top right corner, using some of the flower die cuts, puffy stickers and enamel dots. To balance the design, I added a smaller cluster to the bottom left of my photo.


On the right side of my layout, I used a fun circle grid paper, and thought it would be fun to follow the shape with my photo and embellishments. I printed my photo and used a 2 inch circle punch to punch it out. I placed it in the center of the paper, and I used the Orange Puffy Alpha Stickers to add the title around my photo. Once I had the letters in place, I machine stitched around it with my sewing machine.


I finished my layout by adding a mix of embellishments and some stamping. I placed stars, hearts and butterflies on the patterned paper, following the burst pattern. I love mixing different embellishments to add texture and dimension to my layouts. For a final touch, I used the January All the Things stamp set to add some phrases to the layout. I really liked the contrast of the black ink with the pops of color from the January products.

I hope you'll give the 3-To-Inspire challenge a try! It's a fun way to use the products in your kits, and find ways to get creative!


Tuesday, March 31, 2020

You go Girl with Joanna

Hi friends, Joanna Bandelin here sharing my last scrapbook page for The Cut Shoppe. It's been so fun designing for this team and I will definitely miss it! 

For my page I used the You Go Girl cut file and backed it with Crate Paper All Heart collection.


The photos of my daughter were too cute and just went well with the large title.


I added a few clusters around the pictures with a mix of chipboard pieces, stickers and ephemera. 


I added a subtitle on the right photo with some alpha stickers.


I love the end result, such a fun girly page! 
Thanks for stopping by.


Monday, March 30, 2020

Love This | Marsha Farris

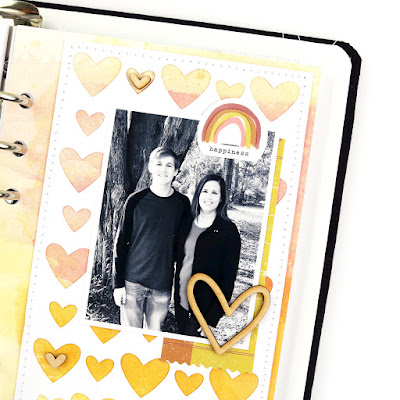
Hey friends!  Marsha here sharing a layout in my life crafted album.  For my final project for The Cut Shoppe, I chose to create a spread using one of my favorite cut files- the Love Rules cut file.

Here's a look at the layout and cut file:


To begin the spread, I cut out the heart TN portion of the cut file using white cardstock.  I adhered it to a patterned paper sized to fit in the album.  Next, I did some machine stitching around the edges of the cut file.  I added my photo and used some wood veneer hearts as embellishment, adding them to the hearts that were cut out in the cut file.  I also added a rainbow sticker and wood veneer heart to frame the photo.


For the other side of the layout, I adhered a strip of the same patterned paper to the left side of the page and did more machine stitching around the edges.  I layered some tags and a label and created my title using a puffy word sticker and stamping.  To complete the page, I added my journaling in strips below the title and added a few more wood veneer hearts.


Thank you for stopping by today!  I have enjoyed my time here, sharing projects using the awesome cut files from The Cut Shoppe store!

xo,

Sunday, March 29, 2020

Somewhere Over the Rainbow | Tarrah McLean

Hi friends,

It's Tarrah back with you and today it is sadly my last post and share with you as part of The Cut Shoppe design team. :( It has been an absolute blast being on this team and using Ashley's cut files! Thank you so much for having me Ashley!

So now to my layout! I decided for my last layout that I would create something bright and fun to hopefully cheer people up with all the uncertainty and difficult times you may be going through. 

I used the Over the Rainbow cut file and cut each individual piece of the rainbow using different coloured cardstocks. 


Over the Rainbow

Once I had the cut file pieces all stuck down in rainbow order, it was time to add my photo and embellish! The photo is of my gorgeous niece in a pretty rainbow dress and handbag that matched! Perfect photo for this layout! I added a rainbow paper underneath the photo and placed it slightly to the right of the centre of the rainbow. To balance all the colour at the top of the rainbow, I decided to add a rainbow strip of paper down the very bottom of the page. I love how that looks!

With embellishing, I tried to embellish tone on tone where I could. The flair button was perfect in the centre of the rainbow on the blue piece as it had the same blue background. I added some pink enamel hearts in some of the heart cut outs of the cut file. I also added some phrase stickers that suited the page also. 

The white fluffy hearts are a fabric embellishment made by a lady in Australia. I added a small gold heart sticker to each cloud. On the yellow piece of the cut file, I added some yellow glitter chipboard thickers from my stash and that became the beginning of the title of the page. On the right of the photo, I punched out a heart from red cardstock and layered a gold sticker heart over the top of that one too.

Thank you so much for your support using The Cut Shoppe cut files on the design team. I do hope that you all continue to support Ashley and The Cut Shoppe by purchasing her amazing cut files!

Happy creating, stay healthy and look after each other!

Friday, March 27, 2020

Wizarding World / Kim Jeffress

Over the Christmas holidays my boys became obsessed with all things Harry Potter. In January we visited an open air movie theatre with a showing of a Harry Potter movie. When I saw the
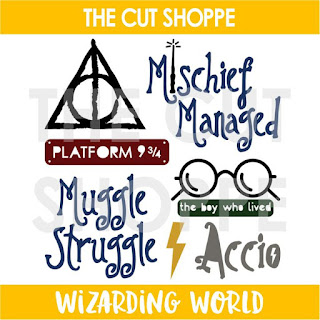
 Wizarding World cut file in the Cut Shoppe shop  I was so excited to get this memory recorded in my Heidi Swapp notebook.


I choose the glasses and boy who lived cut files and cut them on some white cardstock.


I then adhered the cut files to my background paper. I adhered my glasses cut file to the top of my page, trimming the top of the glasses for a fun effect. 


 For any Harry Potter loving family the Wizarding World cut file set is the perfect one for you! 


Thursday, March 26, 2020

FINAL NEW RELEASE!

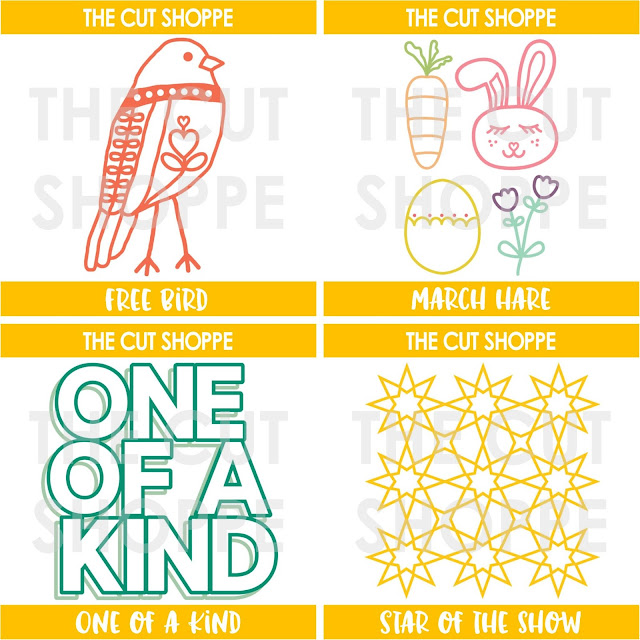
Today is the last NEW Cut File release from The Cut Shoppe.  If you missed the announcement earlier this month, you can find it HERE.  I have loved creating so many designs and seeing them on your projects over the past 6 years.  I hope you will visit the store and pick up some of your favorites from this new release.

https://thecutshoppe.com.co/collections/new-designs
  
There is also a FREE Cut File available in the store.  You can find Stay Home in the Free Designs section of the store.  I'm sure you have a lot of stories to tell about what is happening in your home and with your family during the Covid-19 outbreak.  I hope you can use this cut file to help tell those stories.

https://thecutshoppe.com.co/collections/free-designs/products/stay-home

Thank you again for all of your support since The Cut Shoppe opened in 2014!  I couldn't have done it without so many amazing customers and designers!

Tuesday, March 24, 2020

Happy spring layout - Lisa Fonseca

Hey friends, 

it's Lisa on the blog and today I'm sharing my last layout for TheCutShoppe.


The cutfile I'm using is called Happy spring, you can find it by clicking on this link. :)

For this layout, I wanted to use very bright spring colors, so I chose pink, yellow and mint. I went through my paper scrap stash and chose all the ones that I thought would look good together, then I traced all the letters on the mint and pink papers and cut them out. 


For my background, I created three stripes of color, using acylics, on a white cardstock sheet. Then I adhered my letters to the mint and pink sections. I wasn't careful with the placement of the letters, I wanted them to be a bit crooked, so that when I placed the cutfile on top, they would't match perfectly. If you have been following me for a while, I'm sure you know that I like doing this. I like when the letters peek out from the sides.


The yellow section was still empty at this point. I wanted to place my photo there but I also needed something else to fill up more space. So I went back to my cutfiles and used one of the flowers from the Spring Flowers cutfile. I backed it, as well as my photo, with a yellow patterned paper. I thought it would be cool if the flower had a stem going down to the green section. So I cretated a stem with leaves and a cute little knot. 


I went through my stash and chose a lot of cute little details to add. Stickers, ephemera pieces... I added them all to the corresponding section. To finish I splattered some paint. 
I hope you like how it turned out. 


I want to thank Ashley Horton again for giving me the chance to work with her great cutfiles. Audrey, I wish you all the best for your future projects. :) 

Don't forget that you can still purchase cutfiles on the CutShoppe website!!! :) 

Thank you for the support and nice comments on Instagram.

See you,

Lisa