Hello there! I enjoy handstitching on layouts (especially during long car rides) and was really excited when Ashley taught me the technique of using a sketch pen in the Cameo to turn the cut files into patterns! I had been cutting and tracing them, so I was pretty pumped at the genius of this idea. I put it to use during my last road trip, and it turned out great!
I used the Tag, You're It cut file, and just removed the tag part in the Sillhouette Studio. The "All Day Everyday" saying was perfect for my Starbucks addiction!
I stitched each word in colors that matched the Dear Lizzy Fine & Dandy collection. The pops of green were a great match to the Starbucks logo!
I'm starting to realize that I might have a bit of a caffeine problem :)
I hope this inspired you to use your cut files in another way! If you're feeling stuck, try using sketch pens, stitching, or modify the cut file! It's a great way to mix it up.
I love it when a photo and a cut file come together perfectly! I created the Graffiti Greetings cut file a while back and knew it would definitely be the one I used for my post, when the time came. I didn't have a certain photo in mind though...until I snapped this photo of our middle daughter playing in the sprinkler earlier this week. She was doing her thing and posing while I snapped photos. I ended up with this one, with her fist up and a determined look on her face! So it ended up being a match made in heaven!
I decided to cut the Let's Do This image, to the full size of my Cameo mat, because I wanted to add my photo behind the "O". The Happy Things collection from Pinkfresh Studio worked really well with the colors in my photo, so I used a multi-colored patterned paper for the background. I used my watercolors to add some color to the cut file and a few of the positive letters, that I added back into the words, once they were painted. I also hand stitched around each of the letters with embroidery floss, to make the words stand out a bit more. Since I had a lot of color on this layout, I kept the embellishments to a minimum and used Black & White, transparent items and wood veneers.
If you're stopping by The Cut Shoppe to do a little shopping, don't miss out on the other two new sets that are now available in the Shop!
And don't forget, that our Design Team Call is still going on! You can find all of the details for applying, HERE.
Supplies: Graffiti Greetings Cut File: The Cut Shoppe; Patterned Paper, Thickers, Wood Veneers, Acetate Triangles, Rubber Charm & Puffy Stickers: Pinkfresh Studio; Flair Button: A Flair for Buttons; Color Shine: Heidi Swapp; Enamel Dots: Freckled Fawn, Die Cut Machine: Silhouette Cameo
Hey there, friends! Missy back with you today. I have a layout to share with you using the adorable Little Letters cut file. I love that the letters overlap, and I knew right away I wanted it to be a background element on my page.
I started out with papers from the Pinkfresh Studio Up in the Clouds collection. I cut the file on a colorful patterned paper. I used the dotted paper as my base, and I covered a big section of it in white gesso. I used a lot of gelatos and some spray inks to create the watercolor look behind the cut file. I brought in a lot of American Crafts Rise & Shine embellishments as well as some washi tapes from my stash and a few flair buttons from A Flair For Buttons.
I love how the gelatos look behind the cut file. I didn't want it to be just white behind it...I think the different colors make it stand out a bit more. I added some of the AC washi tapes and some different color stitching.
I couldn't resist using this flair button...it's perfect for a layout about books or reading! I layered in some black and yellow thread to throw in a few more pops of color on that side of the layout.
Here's another look at the top of the cut file and more of the AC washi tape. I also used a black pen to trace around all of the letters. I think this makes them look a little more crisp.
I originally made the title all black Thickers but changed my mind. I decided to break it up by bringing in some hot pink and yellow Thickers. I also added in another flair button.
Here's a look at how this layout came together if you'd like to check it out. Hope you enjoy!
I hope this gives you some ideas on how to incorporate this cut file into a background for your layout. Thanks for stopping by, and have a great day!
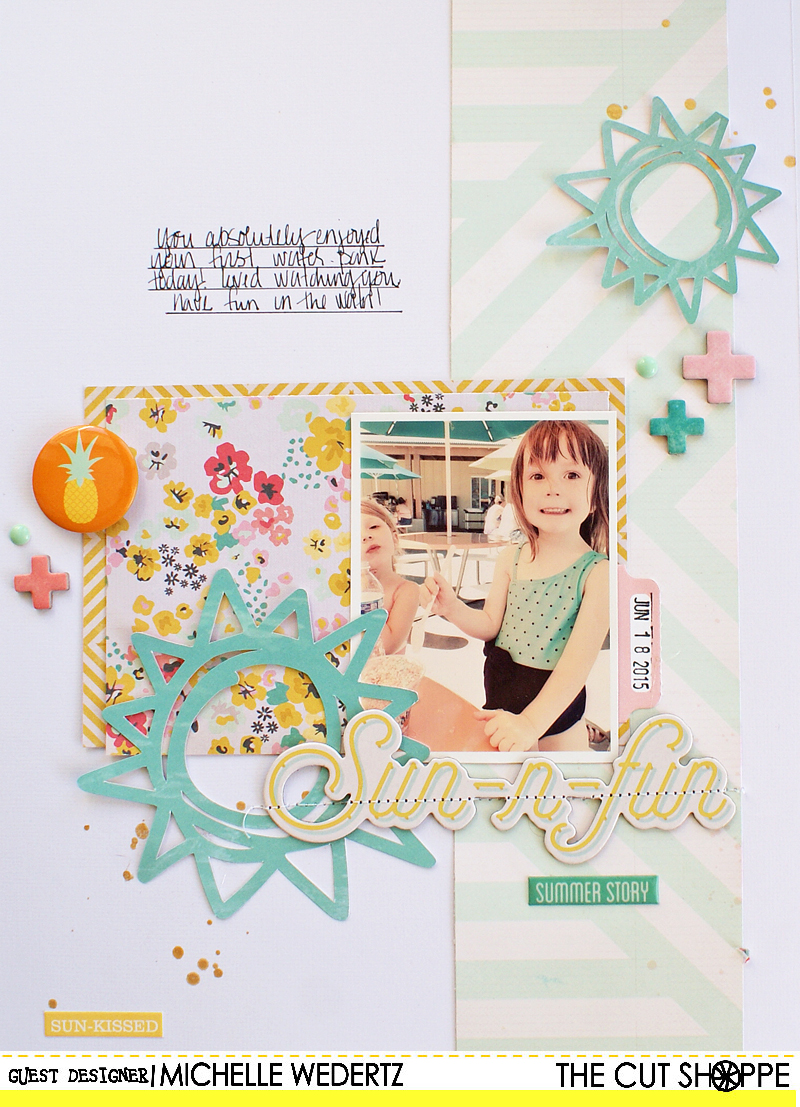
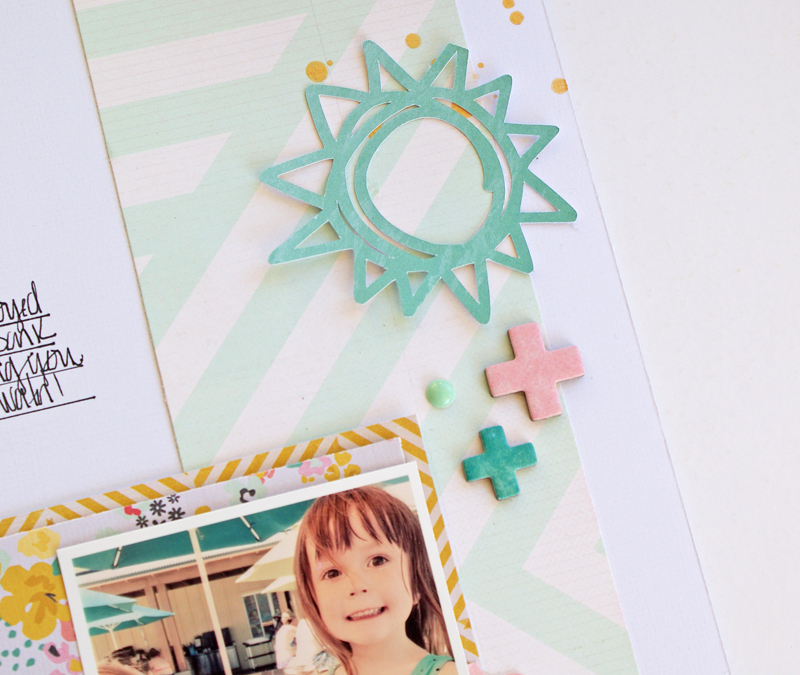
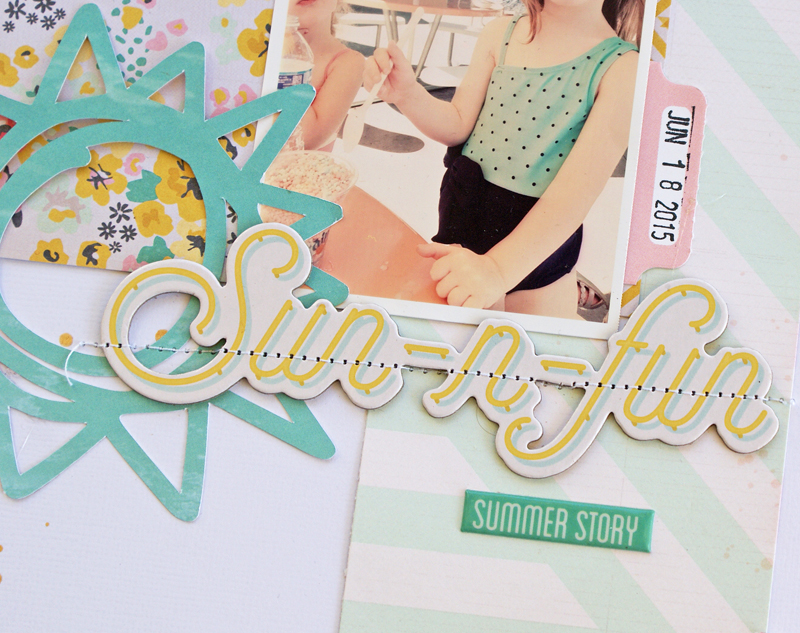
I was super excited when I saw the Make a Splash cut file pop up in The Cut Shoppe! I am a big fan of summer and all activities water related, so this is sure to make it's appearance in many of my projects.
My favorite of the designs is the sun and I let that inspire this next layout, Sun-n-Fun!
One of the ways I like to use cut file shapes is to cut them out in more than one size and play around with their arrangement. I find that this is an easy way to not only make a project cohesive, but also to lead the eye around the page.
Working on this sunny layout certainly made my day brighter ;). Wishing you a great week!
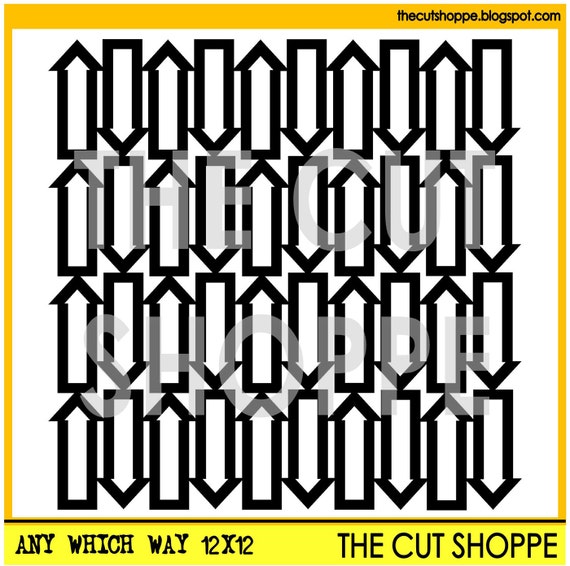
Good morning, everyone! Kat here today to show you how I used one of my favorite new cut files.
When I saw the "Any Which Way" background, my mind instantly began thinking about ways I could use it, what directions to place my arrows in, how to fill in the arrows, etc. It's just such a fun file with unlimited possibilities. Ultimately, I decided to use the arrows going up and down. I took the 8.5 x 11 file and only traced 5 rows of the arrows. I eventually decided to place the arrows to one side instead of in the middle. I really thought this was the perfect cut file to highlight the photo of my nieces flying a kite on the beach:
I went with a softer color palette than I'm used to, but I think it complements the photo and theme well. It's hard to tell here, but I also sprayed the cut file with some Calico shine, so it looks really pretty in person.
Happy Throwback Thursday! This week I just couldn't decide what cut file I wanted to work with. I went back and forth between the backgrounds, titles and icons! I knew what photo I wanted to work with, and decided to grab the new Happy Things collection from Pinkfresh Studio. When I came across the Ombre Mosaic/Confetti Circle patterned paper, things clicked, I knew exactly what cut file to work with. The Let Them Eat Pie cut file set was a perfect match for this collection!
I started by cutting the pinwheel shaped image in three different sizes from White cardstock. Then I backed each open space with a different patterned paper from the Happy Things collection. Before adhering the cut files to the layout, I machine stitched around the circle design. Once I had the cut files arranged on my page, I added my photo, title and embellishments! I also have a new Process Video to go along with this layout, if you would like to check out how everything came together!
Supplies: Let Them Eat Pie cut file: The Cut Shoppe; Patterned Paper, Wood Drop Stickers, Rubber Charms, Wood Veneers, Letter Stickers, Acetate Die Cuts & Puffy Stickers: Pinkfresh Studio; Flair Button: A Flair for Buttons; Color Shine: Heidi Swapp; Die Cut Machine: Silhouette Cameo
It's time for a Design Team Call! If you love designing with an Electronic Die Cut Machine and Cut Files, then we are looking for you!
I
am looking for Designers who love to use cut files on their layouts and projects, have a great design style, are responsible with monthly
assignments and keep an active Blog. You must own an Electronic Die Cut
Machine to work with the Cut Files. Designers would be required to
create two projects each month, and post on The Cut
Shoppe Blog, your personal Blog, Instagram and/or Facebook, and in at
least one online Gallery. Projects would also be required for Blog Hops or Team Ups. To apply, please email your application to thecutshoppe@yahoo.com, with at least 3 images of your recent projects, along with the following: Name and email address Blog Address Link to your current Gallery Current Design Teams The
Design Team will serve a six month term from September 2015-February 2016.
During the term, please do not design for any other Digital Cut File
Teams.
Designers
will receive access to a selection of Cut Files that are currently
available in the Shop, and also all new cut files that are created
during your term. You will also receive a Design Team badge to display
on your Blog and a Design Team footer to add to your projects. We will
have a Design Team Facebook group, to keep up with Team communication. I'm looking forward to your applications and seeing your amazing work! The Call will close on MONDAY, AUGUST 3rd, and the new Team will be announced on THURSDAY, AUGUST 13th.
Open to US and International Designers and current Design Team members.
It's Cara here today! How is your summer going so far? Phew, July has been a crazy month for us and it's only half over!
I wanted to create a layout that reflected this feeling of a crazy-busy month so I went with the Any Which Way background cutfile. Arrows are a perfect way to show busy-ness and backing it onto this colourful patterned paper really reinforces that feeling!
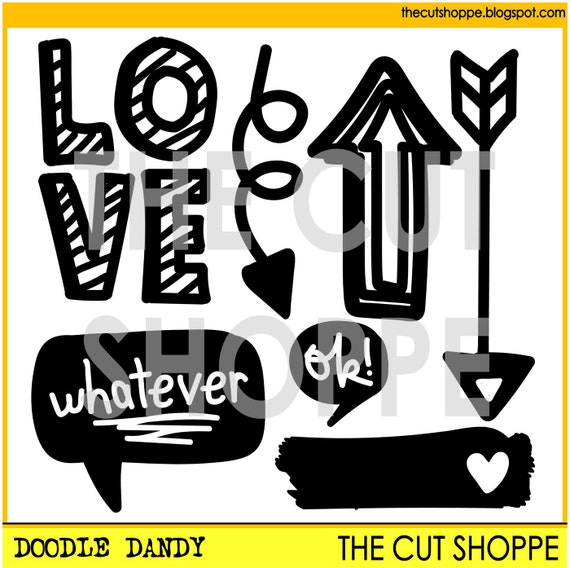
I also used the arrows from the Doodle Dandy cutfile to add more movement. I cut them pretty small and scattered them around the page. I love how they look with the white background arrows.
Ok, I'm going back to our busy July!
Hope that you are enjoying a fantastic summer! Happy scrapping :D
Fearless here today to share with you one of my project life weeks, I had have so much fun with this one, dies from the cuts shoppe + watercolors are perfect match!